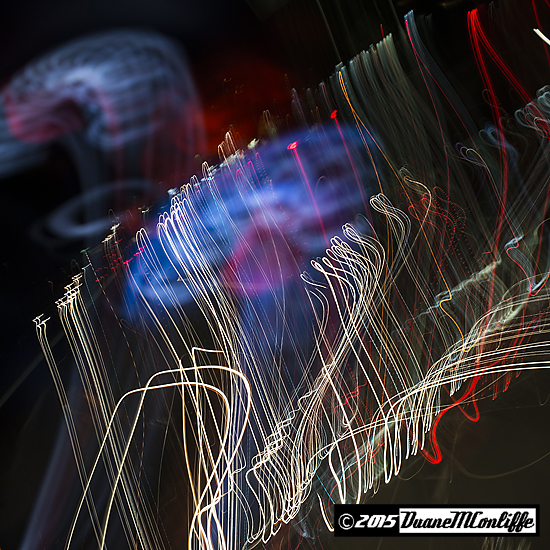
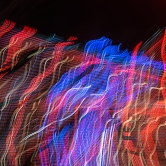
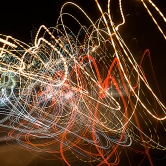
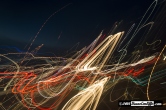
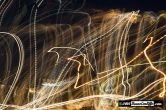
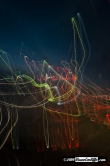
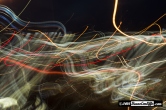
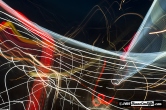
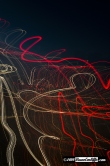
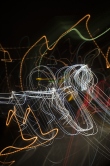
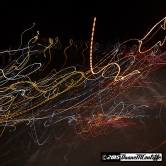
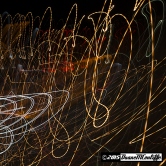
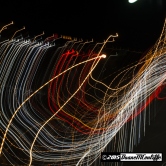
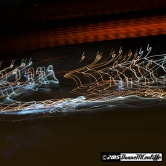
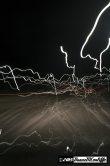
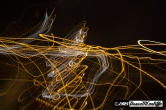
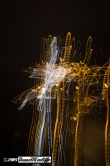
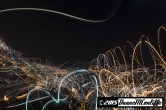
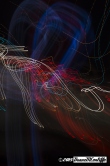
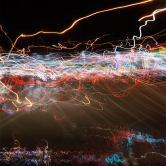
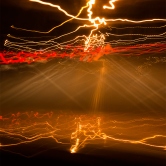
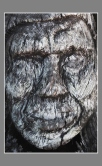
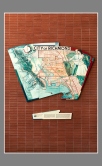
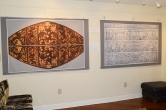
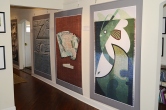
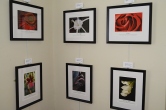
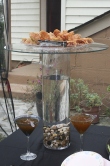
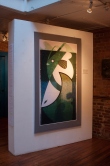
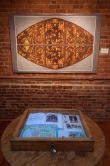
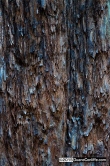
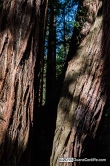
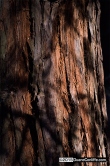
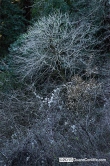
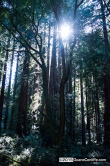
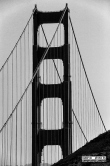
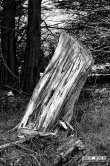
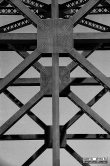
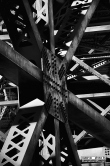
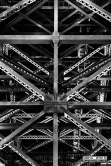
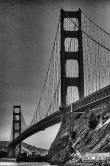
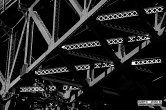
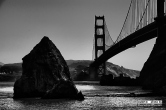
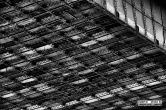
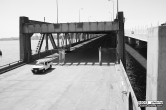
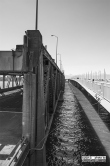
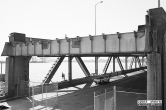
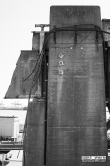
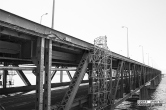
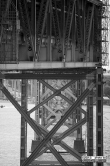
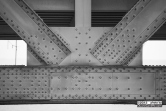
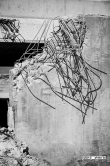
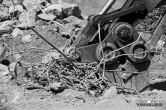
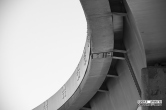
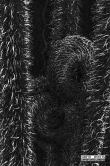
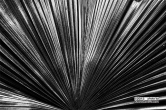
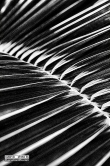
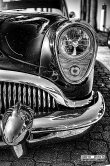
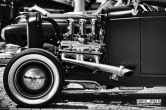
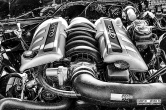
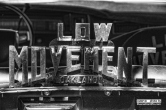
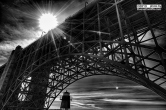
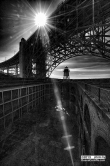
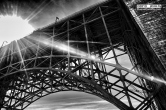
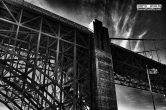
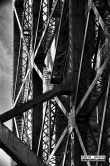
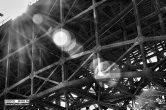
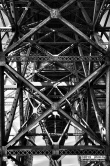
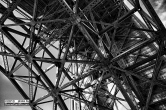
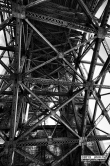
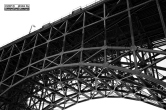
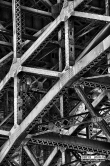
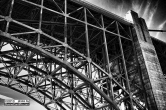
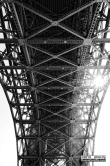
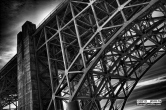
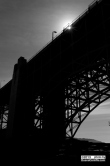
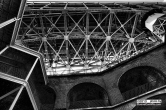
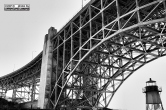
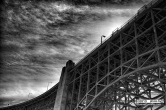
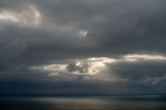
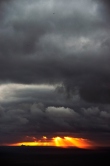
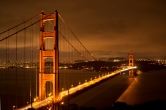
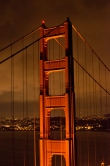
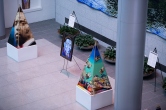
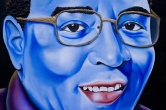
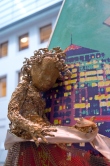
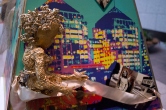
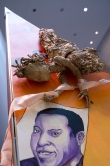
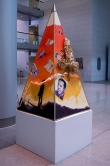
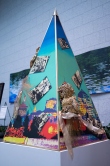
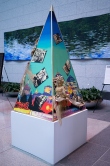
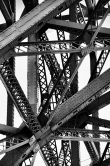
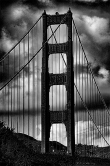
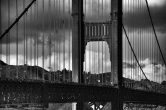
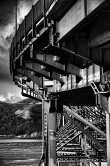
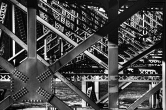
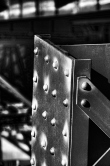
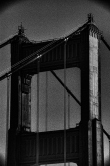
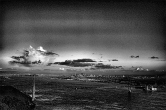
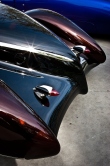
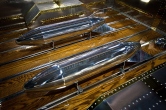
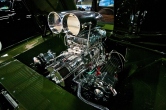
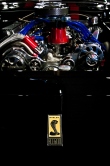
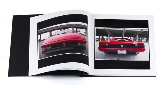
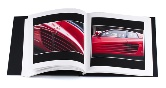
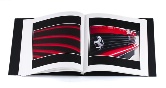
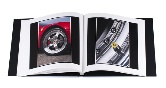
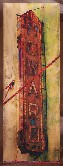
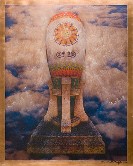
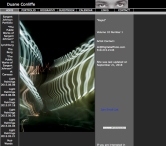
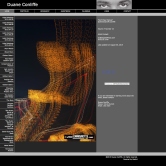
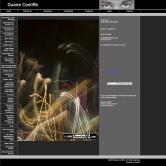
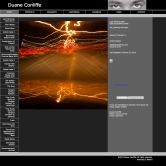
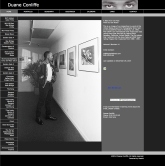
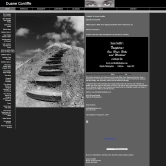
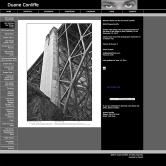
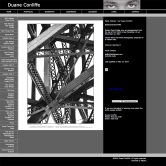
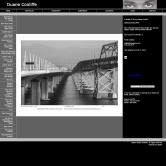
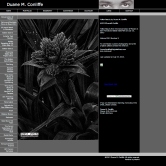
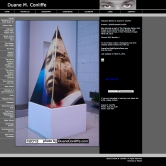
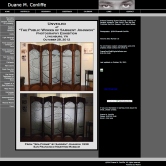
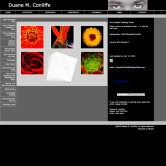
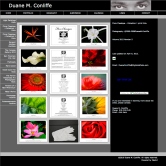
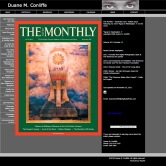
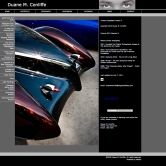
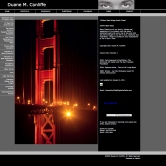
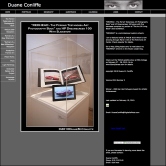
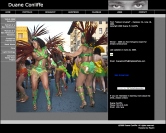
Duane Conliffe
HOME PORTFOLIO BIOGRAPHY GUESTBOOK CALENDAR LINKS CONTACT
Space Graph
 
Slideshow  |   Enlarge
 Previous «   36 of 398   » Next 
More 'Light Paintings 4' by Duane Conliffe
Light Painting 7340 Photography Light Painting 7415 Photography Light Painting 7419 Photography
Light Painting 7422 Photography Light Painting 7436 Photography Light Painting 7440 Photography
Light Painting 7441 Photography Light Painting 7456 Photography Light Painting 7468 Photography
Rancho Photography Selector Photography Cursive Photography
Photon Understory Photography Point Made Photography Photon Wash Photography
Mega Mesh Photography North Bay Mashup Photography Freestyle Refraction Photography
XL Photography Red Hook Photography Fast Car Wild Photography
The Fray Photography Riff Photography Swan Photography aRtPM Photography
Aura Photography Bring It Back Photography But, wait ... Photography
In It Photography Lux Photography Macro King Photography
Red Whip Photography Scratcher Photography Shake Photography
Solvent Photography Space Graph Photography Tangle Photography
Thread Photography Transit Photography Crackle Photography
Above & Below Photography Discharge Photography Gas Space Photography
FrequentSee Photography Kickin' Up Dust Photography Maroon Photography
Passin' Thru Photography The Bottom of the Sea Photography The Classroom Photography
The Cyclist Photography The Edge of Sky Photography ThunderBird Photography Wave Tips Photography
WeMove Photography Light Painting 6888 Photography Light Painting 6890 Photography Light Painting 6891 Photography
Light Painting 6916 Photography Light Painting 6921 Photography Light Painting 6930 Photography
Light Painting 6933 Photography Light Painting 6937 Photography Light Painting 6941 Photography Log Sculpture Photography
Organ Screen Photography Sargent Johnson Mark Photography Mosaic Tiles Photography
George Washington High School W Frieze Photography American Pride and Purpose Photography Dr. Brenda Waller and Duane M. Conliffe Photography, Color
Antique Dressing Screen Frontlit Photography Antique Dressing Screen Backlit Photography
Ann van de Graaf and student hosts Photography The Artist speaks to student hosts Photography
Mrs. Audrey Conliffe, my mother. Photography Sargent Johnson Picture and Show Poster Photography Miss VUL 2012 and the Athletic Frieze Photography
Ann by Organ Screen tapestry Photography Photo Tapestries 3 Photography
Athletic Frieze Photography Log Sculpture Photography Photo Tapestries 2 Photography
Photo Tapestries 1 Photography Botanicals 1 Photography
Ferrari Prints Photography 2 Artworks Photography Botanicals 2 Photography
Botanicals 3 Photography Botanicals 4 Photography Guest Book Photography
VUL Student Signs Guest Book Photography Dr. Brenda Waller Photography Violet Mitchell Photography
3 Friends Photography Show Visitors 3 Photography
Mr. James Harris, the Artist and Mrs. Vida Anderson (the Artist's sister) Photography Hiawatha Johnson, Jr. and the Artist speak Photography
Student Host greets Guest Photography Goodies Table Photography Goodies Photography
Goodies Too Photography Yet More Goodies Photography And now, the sweet stuff ... Photography The Harris Family Photography
Ann van de Graaf and Miss VUL Photography Ann van de Graaf and Miss VUL 2012 Photography Miss VUL 2012 Speaks Photography
Ralph Reavis, President of VUL Photography Orchids for my Mother Photography
Artist Talks Photography Artist Talks 2 Photography
Artist Talks 3 Photography Artist Talks 4 Photography
Artist Talks 5 Photography Acknowledging Dr. Brenda Waller Photography Acknowledgement Photography
The Artist with Student Hosts Photography VUL Student Hosts Photography
The Artist with Ann van de Graaf Photography The Artist with Sidney Moreno, his sister Photography
Andre Whitehead, Dr. Brenda Waller and the Artist Photography Kamau Anderson, the Artist and Vida Anderson Photography
Family Photography The Artist and Mom Photography The Burg Cover Photography
Centerpiece 1 Photography Centerpiece 2 Photography
The Public Works of Sargent Johnson at The Canessa Gallery 1 Photography The Public Works of Sargent Johnson at The Canessa Gallery 2 Photography
The Public Works of Sargent Johnson at The Canessa Gallery 3 Photography The Public Works of Sargent Johnson at The Canessa Gallery 4 Photography The Public Works of Sargent Johnson at The Canessa Gallery 5 Photography
The Public Works of Sargent Johnson at The Canessa Gallery 6 Photography The Public Works of Sargent Johnson at The Canessa Gallery 7 Photography The Public Works of Sargent Johnson at The Canessa Gallery 8 Photography The Public Works of Sargent Johnson at The Canessa Gallery 9 Photography
The Public Works of Sargent Johnson at The Canessa Gallery 10 Photography The Public Works of Sargent Johnson at The Canessa Gallery 11 Photography The Public Works of Sargent Johnson at The Canessa Gallery 12 Photography
Muir Woods_6567 Photography Muir Woods_6571 Photography Muir Woods_6724 Photography Muir Woods_6674 Photography
Muir Woods_6598 Photography Muir Woods_6743 Photography Muir Woods_6729 Photography Muir Woods_6647 Photography
Muir Woods_6581 Photography Golden Gate Bridge Marin Side Photography Golden Gate Bridge and Hillside Photography Golden Gate Bridge Undercarriage Photography
Golden Gate Bridge Tower Photography Tree Stump Photography X Bracing Photography Brute Strength Photography
X Factor Photography Intersection Photography Light & Steel Photography Little House Photography
Golden Gate Bridge North Photography Criss Cross Photography Rock and Bridge Photography
Spring Loaded Photography Bay Bridge Chop Photography Eastern Spans Photography
The Chop Photography The Cut Photography The Old Eastern Span 1 Photography
The Old Eastern Span 2 Photography Old and New Photography Scaffold Photography X Bracing Photography
Bracing Photography Abstract Destruction Photography Rebar Stomp Photography
Curve 1 Photography Curve 2 Photography
Curve 3 Photography Tropical Plant Photography, B/W FlameOn! Photography Texture Shape Light Photography
Fuzzy Photography Frequency Photography Cluster Photography Squeeze 1 Photography
Squeeze 2 Photography Squeeze 3 Photography Little Red Beauty Photography Leaves on Water Photography
The Crease Photography Tropical Leaves Photography Tropical Vessels Photography Yellow Beauty Photography
Corvette Flags Photography 54 Buick Photography Ford Photography
Hot Rod Photography GTO Photography
Low Movement Photography Impala SS Photography
Black Impala Photography Impala SS Rear End Photography Springer Photography
Futura Photography Austin Healey 3000 Photography Futura Hood Ornament Photography
Remove Before Flight Photography Thunderbird Photography Burst 1 Photography
Burst 3 Photography Burst 2 Photography Glory Photography
Metal Abstract 3 Photography Light & Steel Photography Metal Work 3 Photography
Metal Work 2 Photography Metal Work 4 Photography Metal Work 6 Photography
Metal Work 5 Photography Metal Work 7 Photography Rise Photography
Metal Work 8 Photography Silhouette Photography Steel Sky Photography
Swerve 1 Photography Swerve 2 Photography
Sonoma Raceway Photography The Garage Photography
Firestone Firehawk Tires 1 Photography Carousel 2 Photography IndyCar on Asphalt Photography
Ninja Black Photography Carousel 1 Photography Firestone Firehawk Tires 2 Photography
Climb Photography Kickin' Up Dust Photography
Faster Photography
Blaze Photography Sonoma Hills Photography Firestone Firehawk Tires 3 Photography
Pearl White Photography Golden Gate Bridge on overcast day Photography At the End of the Tunnel Photography
Hover Photography Last Light Photography Golden Gate Bridge at Night Photography
North Tower at Night Photography Golden Gate Bridge Span at night Photography The Chauncey Bailey Altar Project from above Photography
Blue Chauncey Photography The Chauncey Bailey Altar Project Photography Chauncey Bailey by Duane M. Conliffe Photography
Blue Chauncey Close Up Photography Duane Conliffe's pyramid panels close up Photography Carla Oden's Chauncey Bailey portrait piece. Photography Carla Oden's two pyramid panels. Photography
Carla Oden's Chauncey Bailey portrait. Photography Karen Oyekanmi's Angel Second Look Photography Karen Oyekanmi's Angel Close Up Photography Karen Oyekanmi's Second Angel Photography
Makeda Rashidi's pyramid panels Photography Sara Prada's pyramid panels Photography Sara Prada's pyramid panels 2 Photography Bridge Photography, B/W
Golden Gate Bridge San Francisco Side Photography, B/W Golden Gate Bridge Underview San Francisco Side 1 Photography Metal Abstract 1 Photography
Metal Work 1 Photography Foundation 1 Photography Golden Gate Bridge 3/4 View 1 Photography
Golden Gate Bridge South Tower Photography Golden Gate Bridge 3/4 View 2 Photography Braced 1 Photography
Golden Gate Bridge Undercarriage X 1 Photography Beam Section Photography Fort Point Angles 1 Photography
Metal Abstract 2 Photography DoubleUp Photography Golden Gate Bridge Overview Marin Side 1 Photography
Golden Gate Bridge North Tower Top Marin Side Photography Golden Gate Bridge Overview Marin Side 2 Photography Auburn Speedster Photography
Auburn Speedster Detail 1 Photography Auburn Speedster Detail 2 Photography Auburn Speedster Detail 3 Photography
Auburn Speedster Abstract Photography Hood Ornament Photography
Caddy Blue 1 Photography Caddy Blue 2 Photography Caddy Blue Wheel Insignia Photography
Lincoln Zephyr 1 Photography Lincoln Zephyr 2 Photography
Lincoln Zephyr 3 Photography Phat Boy Photography
Shelby GT500 Photography Shelby GT500 Detail 1 Photography
Rockets Photography Polished Photography Classic Shelby GT500 Photography
The Ferrari Testarossa Art Photography Book Photography, Color The Ferrari Testarossa Art Photography Book Photography
The Ferrari Testarossa Art Photography Book Title Page Photography The Ferrari Testarossa Art Photography Book Page 1 Photography
The Ferrari Testarossa Art Photography Book (Page Samples A) Photography The Ferrari Testarossa Art Photography Book (Page Samples B) Photography
The Ferrari Testarossa Art Photography Book (Page Samples C) Photography The Ferrari Testarossa Art Photography Book (Page Samples D) Photography
The Ferrari Testarossa Art Photography Book (Page Samples E) Photography The Ferrari Testarossa Art Photography Book (Page Samples F) Photography
The Ferrari Testarossa Art Photography Book (Page Samples G) Photography The Ferrari Testarossa Art Photography Book (Page Samples H) Photography
The Ferrari Testarossa Art Photography Book (Page Samples I) Photography The Ferrari Testarossa Art Photography Book (Page Samples J) Photography The Ferrari Testarossa Art Photography Book (Page Sample K) Photography
The Ferrari Testarossa Art Photography Book (Page Detail A) Photography The Ferrari Testarossa Art Photography Book (Page Detail B) Photography The Ferrari Testarossa Art Photography Book (Page Detail C) Photography
Howard Theatre Sign Photography, Color Emerge Photography, Color Egypt in Washington 1 Photography, Color Morning Star Photography, Color
Volume 11 Number 2 Photography, Color Volume 11 Number 1 Photography, Color Volume 10 Number 1 Photography, Color
Volume 9 Number 1 Photography, Color Volume 8 Number 1 Photography, Color Volume 7 Number 10 Photography
Volume 7 Number 9 Photography Volume 7 Number 8 Photography Volume 7 Number 7 Photography
Volume 7 Number 6 Photography Volume 7 Number 5 Photography Volume 7 Number 4 Photography
Volume 7 Number 3 Photography Volume 7 Number 2 Photography Volume 7 Number 1 Photography
Volume 6 Number 14 Photography Volume 6 Number 13 Photography Volume 6 Number 12 Photography
Volume 6 Number 11 Photography Volume 6 Number 10 Photography Volume 6 Number 9 Photography
Volume 6 Number 8 Photography Volume 6 Number 7 Photography Volume 6 Number 6 Photography
Volume 6 Number 5 Photography Volume 6 Number 4 Photography Volume 6 Number 3 Photography
Volume 6 Number 2 Photography, B/W Volume 6 Number 1 Photography, Color Volume 5 Number 11 Photography
Volume 5 Number 10 Photography Volume 5 Number 9 Photography Volume 5 Number 8 Photography
Volume 5 Number 7 Photography Volume 5 Number 6 Photography Volume 5 Number 5 Photography
Volume 5 Number 4 Photography Volume 5 Number 3 Photography Volume 5 Number 2 Photography
Volume 5 Number 1 Photography Volume 5 Number 13 Photography, Color Volume 4 Number 12 Photography
Volume 4 Number 11 Photography Volume 4 Number 10 Photography Volume 4 Number 9 Photography
Volume 4 Number 8 Photography, Color Volume 4 Number 7 Photography Volume 4 Number 6 Photography
Volume 4 Number 5 Photography Volume 4 Number 4 Photography Volume 4 Number 3 Photography
Volume 4 Number 2 Photography Volume 4 Number 1 Photography Volume 3 Number 12 Photography, Color
Volume 3 Number 11 Photography Volume 3 Number 10 Photography Volume 3 Number 9 Digital/Graphics
Volume 3 Number 8 Digital/Graphics Volume 3 Number 7 Photography, B/W Volume 3 Number 6 Photography
Volume 3 Number 5 Photography Volume 3 Number 4 Photography Volume 3 Number 3 Photography
Volume 3 Number 2 Photography, Color Volume 3 Number 1 Photography Volume 2 Number 5 Photography
Volume 2 Number 4 Photography Volume 2 Number 3 Photography Volume 2 Number 2 Photography
Volume 2 Number 1 Photography Volume 1 Number 6 Photography Volume 1 Number 5 Photography
Volume 1 Number 4 Photography Volume 1 Number 3 Photography Volume 1 Number 2 Photography
Volume 1 Number 1 Photography
Space Graph
  Photography
  15 x 15 in
1st Edition, 1st Printing, 1/7
 
   Send to Friends 
   Wishlist    Add | Remove | View
 
  Description
 
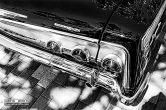
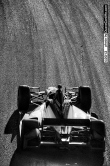
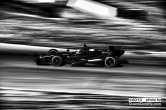
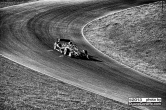
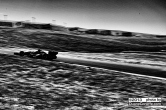
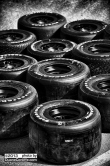
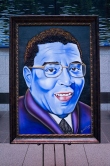
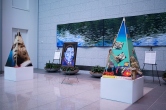
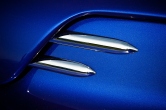
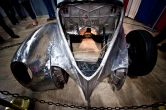
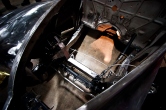
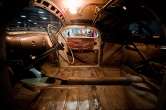
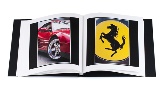
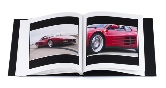
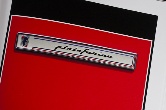
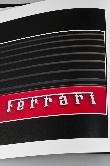
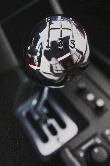
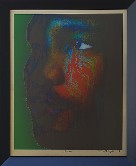
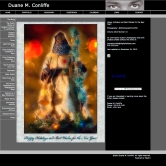
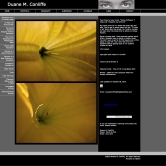
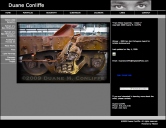
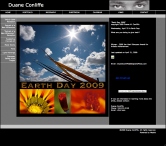
Duane Conliffe loves abstract photography because he can create his own worlds and experience real artistic freedom in this genre. Conversely, the audience is also invited to interpret his abstract images using their own unique histories and perspectives to guide them. There is no right or wrong, there is only art.

Duane Conliffe Light Paintings are created at the intersection of seeing, conceptualization, improvisation, shooting technique, light, motion, emotion and time.

The artist creates his light paintings in the digital camera and refines the images for print in Adobe Photoshop. This is true photography in the same way that film based images can be created in the camera and refined for print in the analog/wet darkroom. The artist makes no additions or subtractions to the image subject matter. The artist processes what he creates in the camera by adjusting tones, color, lens distortion correction, sharpness and etc.

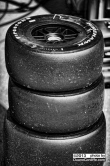
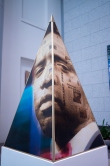
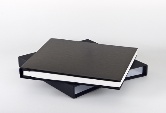
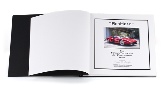
This artwork is printed on 100% cotton rag, heavyweight, acid-free watercolor paper with matte surface and light texture using archival pigment inks for long lasting durability. This artwork bears the artist’s original signature and will arrive without a copyright notice overlay on the image. Artwork is produced in numbered 7 print editions as 1st Edition 1st Printing, 1st Edition 2nd Printing and so on. The artist personally prints all artwork on professional printers.

High quality image capture, processing and printing with great attention to detail and using the best materials available yields a museum quality print that you will enjoy for years to come.

Your print will be delivered to you in a protective clear bag with an acid-free backboard for stability in shipping and handling. All this will be enclosed in a protective cardboard shipping envelope to ensure your delivery arrives safely to you.
 
 
Back to Portfolio